There’s a multitude of reasons to use the GNU Privacy Guard utility (gpg for short) to protect whatever information you want to keep private. This tutorial shows you how to set up your PGP key pair in Linux using the GUI.
To clear up any confusion: GPG is the de-facto open source interface to PGP encryption, which I recommend you read about. I’m sure the reversal of the original anagram was an intended side-effect, but I digress…
Admittedly, this tutorial is a bit of a deviation from my norm, because I personally use the command line for nearly everything, but this should get you going with GNUPG/PGP very quickly and easily. The text assumes you are using Gnome as your desktop environment and that you have the default Gnome software installed.
Begin — Open Up The “Passwords And Keys” GUI tool
From the Gnome dash or from your applications menu, open the GUI tool as shown in the example graphic (figure A)
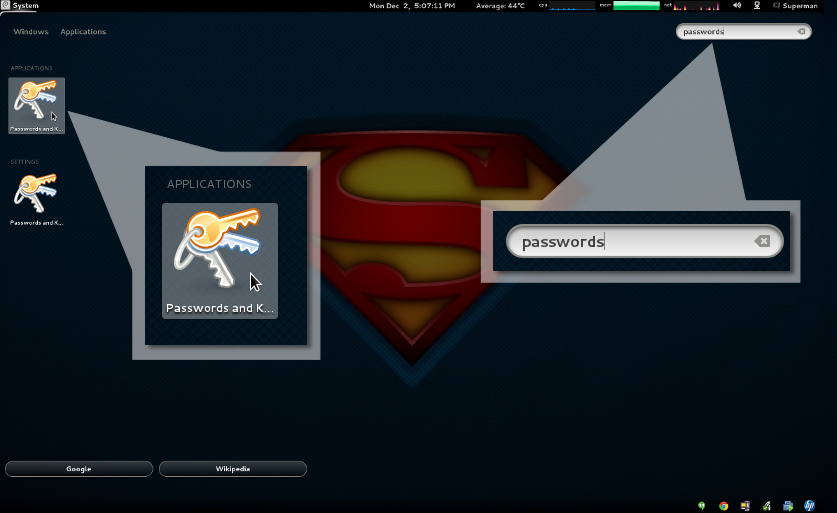
Open “Passwords And Keys” (figure A)
Step 1 — Look Things Over
See what you’ve got here. Under the hood, this utility is called Seahorse. It integrates with a package called seahorse-nautilus that provides a listening service which caches your GPG passphrase (more about that later). Take a look around at what the interface is/does and get a feel for it. Below in figure B you can see an example of what to expect:
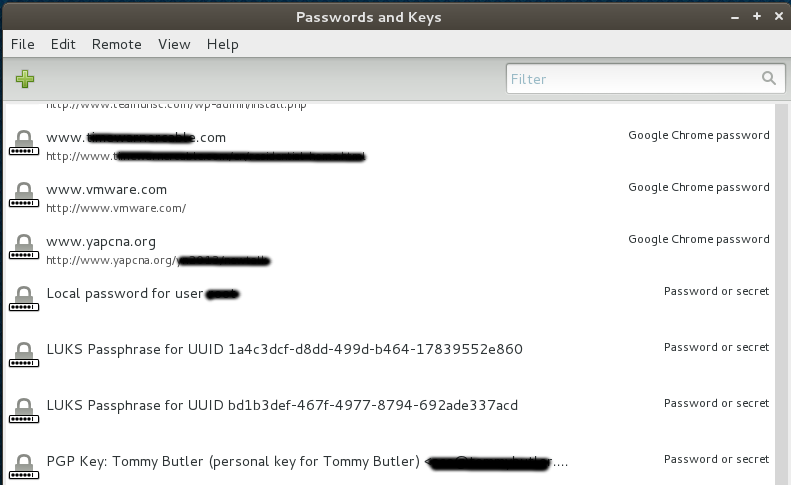
The Seahorse GPG GUI (figure B)
Step 2 — Create A New Key
Your PGP key is tightly associated with your email address. After setting up your key as shown in this howto, you’ll be using it to encrypt messages — typically (but not always) emails are the things you’ll use GPG to encrypt. For this reason, you should make sure you have a permanent email address to associate with your key. Temporary email addresses, forwarders, aliases, email addresses provided by internet access companies or institutions at which you won’t be a long-term member are much less useful.

Create A New Key (figure C)
From the “File” Menu, select “New…” to begin the process of creating your new key pair, as shown above in figure C.
Step 3 — Choose The “PGP” Key Type
Pretty simple. Choose PGP for the key type when prompted, as shown in figure D below. Then click “Continue”.

Select “PGP” Key Type (figure D)
Step 4 — Setup Your PGP Key Attributes
As shown in figure E below, you will be entering your full name and email address at this point. Additionally you can include a descriptive comment. Expand the extra options below to make sure you create a strong RSA key of at least 4096 bits. Optionally you can choose if your key will have an expiration date.

Set Up Your Key Attributes (figure E)
When you’re done, click “Create” and you’ll be prompted for the passphrase to use to unlock your secret (private) key. But “what’s a passphrase?” ….
Step 5 — Choose A Good Passphrase
Your PGP key is special. It is meant to the ultimately trusted way for you to secure your communications. As such, a simple password is not appropriate here. For PGP, you should create your key using a passphrase. A passphrase is like a password, except it’s a full sentence in length, and should include numbers and punctuation, and even poorly-spelled or made-up words. A passphrase should be something you alone can easily remember, and that no one else could ever guess. Common phrases and repetition must be avoided. Things like names, addresses, phone numbers, and birthdays should never be used. Take time to make up a good passphrase. Practice typing it a few times before proceeding. Don’t write it down for someone else to find, and don’t ever forget it. If you do, there’s no way to get it back. Period.
An example passphrase (which you shouldn’t use because it’s now on the internet) would look something like:
“I use @Least 5 fast kix n my awesome ninja muuves! & uh mask 2”
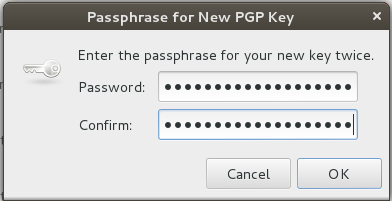
Choose a Strong Passphrase (figure F)
Step 6 — Seahorse Generates Your Key Pair
Behind the scenes, Seahorse will use randomly calculated prime numbers to generate a cryptographically secure key pair (a private key for you, and a public key for you to share with others that is uniquely associated with your private key). When someone encrypts text using your public key, only the person with the private key (you) can decrypt their message, and only you have the passphrase to unlock your private key.
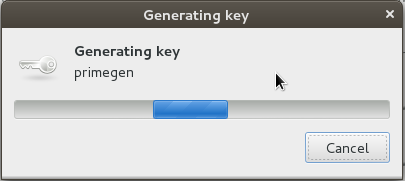
A Secure Key Pair is Randomly Generated (figure G)
Step 7 — Locate Your Key
You’re done generating the key pair. It has been saved in your “keyring” under ~/.gnupg/ which you can export/backup. Type “PGP” at the top of the Seahorse GUI to locate your GPG keys. You should be able to easily spot your new key, as shown in figure H below.
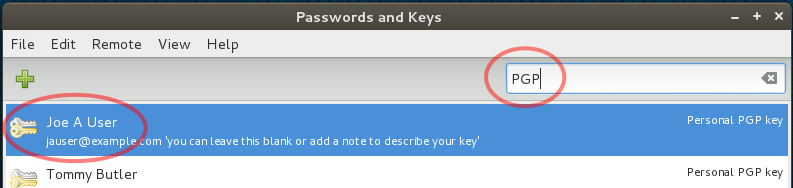
Locate Your New Key (figure H)
Double click your new key entry to open the key properties dialog for one last bit of fun.
Step 8 — Customize Your Key
As shown below in figure I, you will see the properties dialog for your key, showing all the details about it which you set up earlier. There’s more in-depth information tucked away behind other tabs.
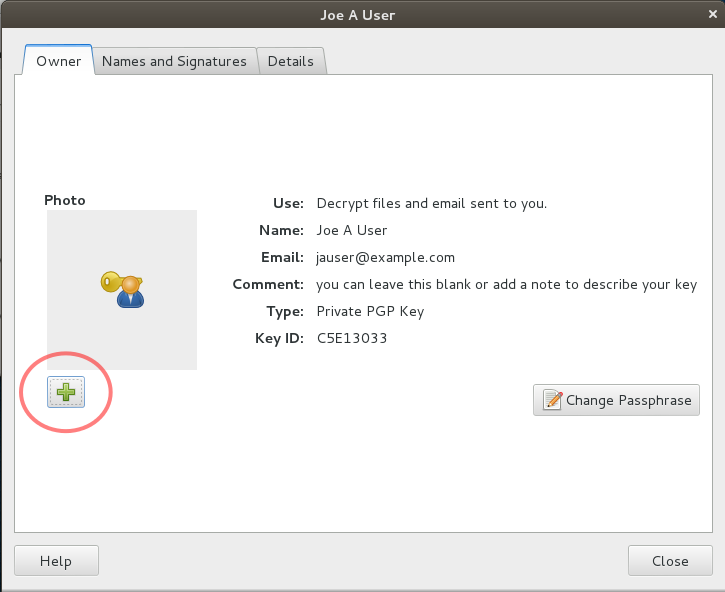
The PGP Key Properties Dialog (figure I)
PGP has a cool, but often-overlooked customization feature for public keys: you can embed a security photo. Common uses for the photo feature include embedded passport photos or other image-types that uniquely identify you. Like a drivers’ license photo, keep it small and simple; if you’re going to be sharing a public key file you don’t want the filesize to become bloated by a huge embedded image. Keep it to 150 x 150 pixels max.
When you click the “plus” button (as shown above in figure I) to select your photo graphic, you’re going to see a very important popup dialog next. For the very first time, you’re going to be prompted for the passphrase you chose to unlock your key, because you’re changing it.
Step 9 — Unlock Your Key
Seahorse provides an integrated service that runs in the background of your Gnome desktop session that can remember your passphrase for you and avoid the need to prompt you for it with each use of your key. By enabling the checkbox as shown in figure J below, you can instruct the service to always do so. Disabling the checkbox will have the opposite effect, causing gpg to prompt you for your passphrase each time you use your key.
If you’re confident you don’t need the memory-reinforcement of having to type your key’s passphrase each time you use it, this can be a very lovely feature.
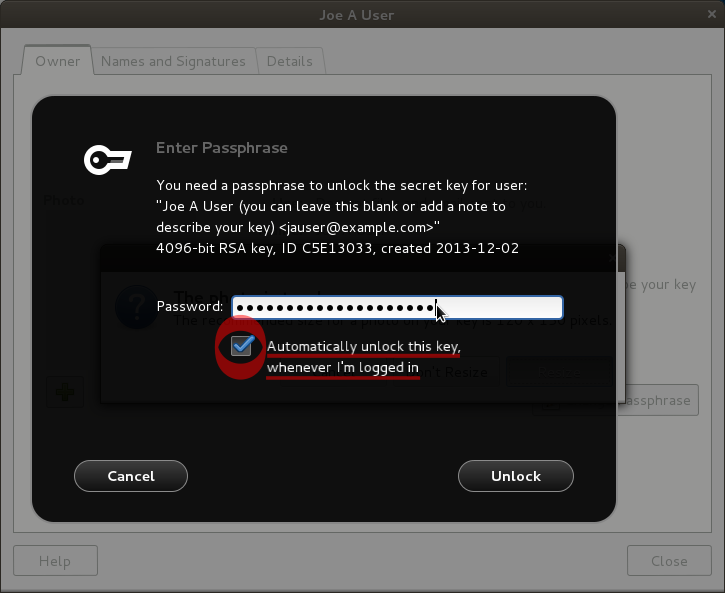
Unlock Your key (figure J)
Step 10 — Use Your Custom Key
Now you’re finished customizing. You can see your photo graphic in the key properties dialog window as shown in figure K. You can further use Seahorse to publish your public key to a keyserver or keyservers so that it is easy for your friends and colleagues to locate when they want to send you an encrypted message. Seahorse provides some useful default keyservers. Ubuntu has a popular keyserver, as does MIT.
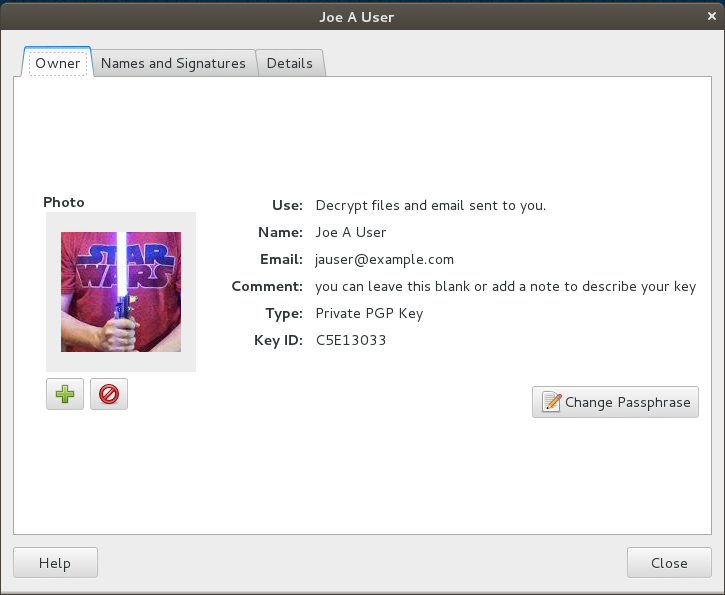
Your Customized PGP Key (figure K)
You can also attach and email your public key to your friends. Remember to never share your private key with anyone. Since you are using Linux, the Thunderbird (or “icedove”) email client supports an extension called “Enigmail” that you can install with your package management software. Enigmail integrates your PGP key(s) into your email in a way that makes it extremely simple to use. It also works on Mac and Windows.
Final Thoughts
Friends, please share this information and encourage your friends and family to use PGP encryption. The reasons become more obvious with each passing year. Sadly, the barrier to entry is the complex nature of PGP technology and its current lack of ubiquity in email communications outside academic and scientific communities.
No matter how much we nerds would like it to be otherwise, the fact remains that it is difficult to understand PGP without an up-front time investment that many people don’t deem worth the effort. Tools like Seahorse and Enigmail make these things easier, so if you can help others to use such tools you will be doing them, and the world, a great service.
This tutorial is dedicated to Phil Zimmermann, creator of PGP, who is often quoted as having said: “The natural flow of technology tends to move in the direction of making surveillance easier, and the ability of computers to track us doubles every eighteen months”